How to Turn Off Location Access for Apps on iPhone

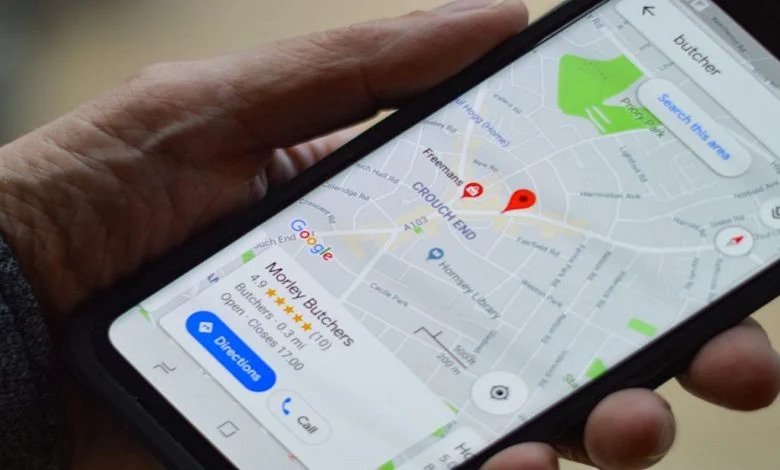
Both Android and iPhone use your data services information, WiFi, Bluetooth, and GPS to store your location. When our lives turn around our smartphones, our gadget stores our location most of the time. This information is very useful since it can be used to track your device if it is stolen. However, information is also occasionally exploited because it is collected by third-party apps/companies and generates worries about privacy. Because of that, most individuals are not happy with the excellent thing. So there's good news in that scenario! The privacy controls can be tightened to prevent harmful applications from obtaining your location. This post focuses on how to turn Apps Access off on iPhone.
The above methods are based on the iPhone 11 that runs on iOS 15, even if you use other versions of iOS that don't make too much difference and tweak the steps a little bit.
Turn Off Location Access for Apps on iPhone
Data is vital for some applications like Daraz, Amazon, etc, and for other applications, such as maps, Careem, Uber, etc. However, such applications sometimes also ask for information for which data exchange is not required. In this situation, the location service for the app can be disabled.
In order to turn off the location sharing, you need to follow the below steps:
Head to the device Settings.
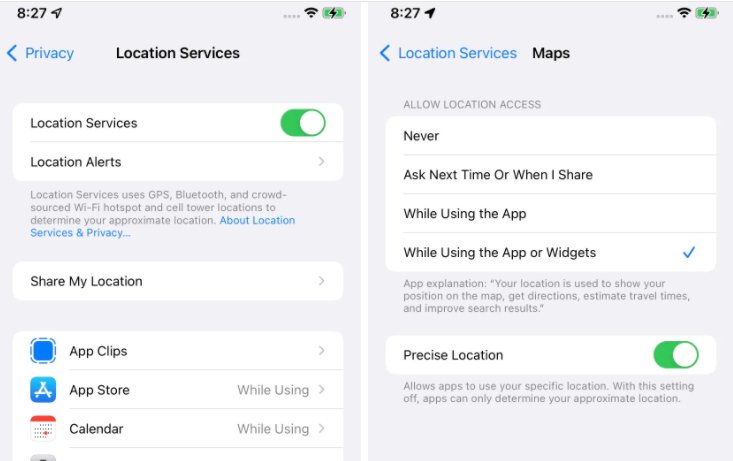
Tap on “Privacy” > “Location Services.”
“Location Services” is always switched on if you do not completely want to cut all location services off.
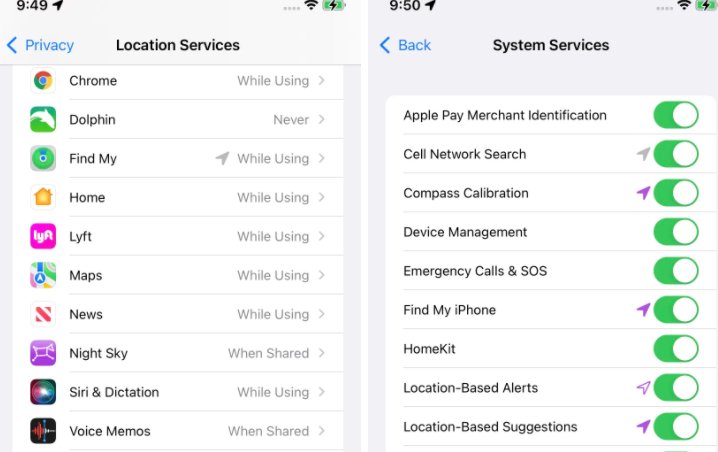
Now scroll down to find the apps with enabled location services. You will see a listing that will show the permission options ie: “Never,” “When Shared,” or “While Using.” “When Shared” means that the app should ask you next time before sharing the location. “While Using” means when you are specifically using that app however, never means that the apps should not share your information with any app.
If you want to change a specific app’s access to your location data, click on the app listing.

The above described choices allowed for sharing locations for certain applications. There are also other ways to limit access to the location click on the "System Services" tab below. You'll be brought to a new window from which the location access can be switched on or off for many things, including Wi-Fi, time zone, emergency calls and Apple News and App Store advertisements.
That's not the end. There are little arrows on the left side of various toggles. The hollow arrow indicates that the applications might use your location information while the lilac arrow suggests that your location has just been used and the grey app shows that your locations have been used in the last 24 hours.

You need to go to the "System Service" screen at the bottom, and switch on the "Status Bar Icon" button to see if any specific programme collects location data from your equipment. It shows an arrow at the top of the screen wherever your phone accesses the site.
If you do not want your device to collect any location data, you can completely turn it off:
· Open Settings.
· Go to “Privacy” > “Location Services.”
· Toggle the “Location Services” switch to off.
· At this point, you will get a notification that as you have disabled the toggle service for all apps, it will enable itself temporarily when you use “Find My iPhone” and report your phone lost. Now it’s your choise to either turn on or Select “Turn Off.”
How to Share Your Location with Individuals?
If you travel somewhere alone and especially in Pakistan we would like to inform our family so that we may share the site in real time. In this instance, you must have iOS 13 or later to share your spot with families and friends using the Find My app.
Here’s what to do:
· Open “Settings.”
· Go into “Privacy,” and make sure “Location Services” is switched on.
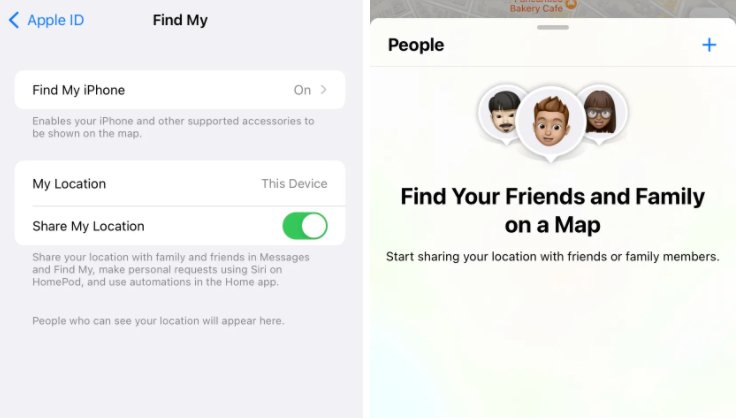
· Go back to the main “Settings” menu and tap on your name at the top.
· Select “Find My.”
· Toggle “Share My Location” so that it’s on.
· Then go to the Find My app. If this is your first time using the app, it will ask you whether you want it to access your location. Choose either to “Allow While Using App,” “Allow Once,” or “Don’t Allow.”
· You may get a screen explaining that “Find My” can be used with an AirTag or for AirPods, and that there are apps for the watchOS as well.
· On the map screen that appears, select “People” at the bottom of the screen.
· Click the button that says “Start Sharing Location.”
· In the “To:” field, type in either the phone number or name of your friend or family member.
· If the person you select has a phone number that isn’t associated with an iPhone, you’ll be notified with a pop-up. (But you can still share your location.)
· Tap “Send,” then select either “Share for One Hour,” “Share Until End of Day,” or “Share Indefinitely.”

Now it will start sharing your location with the people you opted for. To turn it off you need to click on the name of a contact with whom you shared the location. Click on the contact’s name in Find My App and then tap “Stop Sharing My Location”. Now give confirmation by clicking on the pop-up button.
How to Send Recurring Notification:
This is one of the most useful features as it can be used to send recurring notifications. This feature is very useful when you want you friends or family member to know when you reach a specific location.
For this you need to follow the steps below:
· In the “Find My” app, tap the “People” tab placed at the bottom of the screen.
· Select the person you want to send notifications to. This person should be someone with whom you are already sharing your location.
· Now scroll down to find the “Notifications” tab and “Add.” tab
· A pop-up from the bottom will give you the option to notify that person. Select it.
When finished, you can advise the individual you have chosen to come at a certain spot and send them a message after you arrive to inform him or her that you have arrived safely.
This was the most comprehensive guide on iPhone location sharing. If you need to add anything, please let us know in the following comment box.


You must be logged in to post a comment.