How to Add a Google Form to a Blogger Site?
If you want to find out what people think of your blog and yourself, you've certainly experimented with doing an online poll. You've probably tried a variety of methods to create a form that collects data, but none of them have been successful. Fortunately, Google Form allows you to design adaptable forms in a much more straightforward method. We'll show you how to add a Google Form to your Blogger blog today.
What is Google Form?
A Google Form is essentially a set of questions that, when answered, enter data into a spreadsheet. Google Forms is used for a wide variety of purposes by businesses and academic institutions alike. With the help of this Web Polling Service, you can collect your data in a professional manner in just a matter of minutes without paying a penny.
Why to Use Google Forms?
Here are a few advantages of Google Forms that might help you decide whether or not to utilise it. A few minutes of your time will be well spent:
- It's as simple as plugging in a spreadsheet to get the results you want.
- You'll be notified by email when someone responds to your message.
- If you like, you can also email your response to yourself.
- Google's forms are responsive, meaning they look good on small screens as well as large ones Anything, anywhere, at any time is acceptable.
How to Easily Create Google Form?
Creating a Google Form is the first step. Make sure you follow these instructions:
Step 1: You must have a Gmail account in order to create a Google form. If you already have a Gmail account, you should be good. You can log in to your account by entering your email address and password.
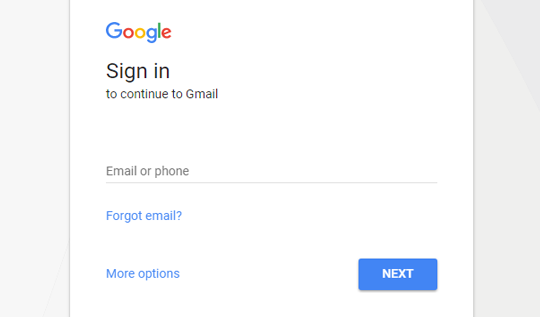
Step 2: After logging into your Google account, go to https://www.google.com/forms/ and create a new form there. You can design a form from scratch, or you can choose from a large selection of pre-made templates to speed up the process.
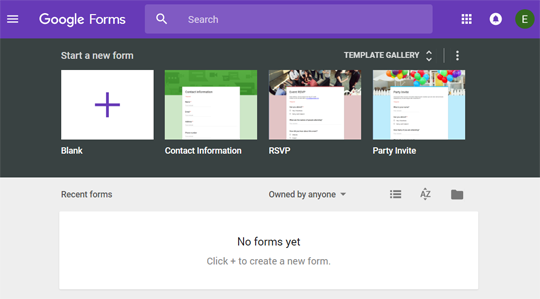
Step 3: Selecting "Blank" will require the following steps in order to create a working form:.
1: Write the form's name at the top of the page.
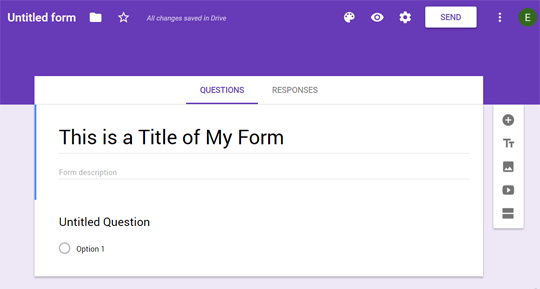
2: Simply click the "Add question" icon to add additional questions to your form. A blank question will be added to the form.
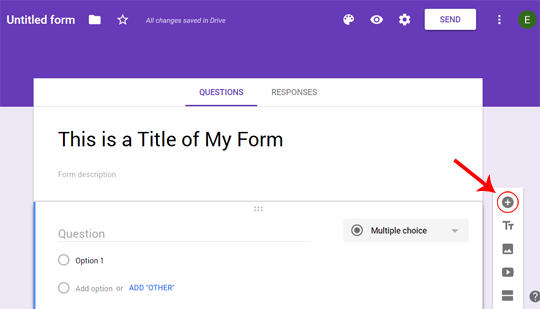
3: The question type can be changed to multiple choice, short question, long question, paragraph, and more after it has been added. As an alternative, you might request that respondents submit a document or other file in order to finish the survey. "File Upload" is the only option that will work.
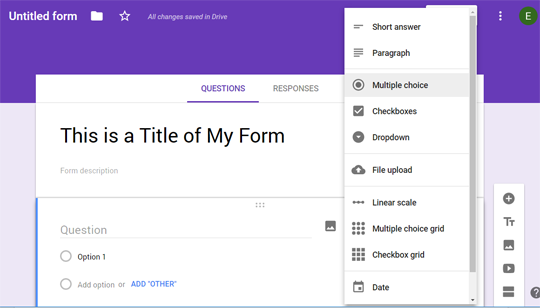
4: From the right-hand menu, you can also add media elements to your form, such as movies and photographs, or even create new sections.
How to Embed Google Form in Blog?
How to integrate a Google form in a blog step-by-step?
Step 1: When you are satisfied with the form you have created, click "Send" in the upper right corner of your screen. Email, link, and embed are all available in a little dialogue box. Copy the iframe code by clicking the "Embed" icon.
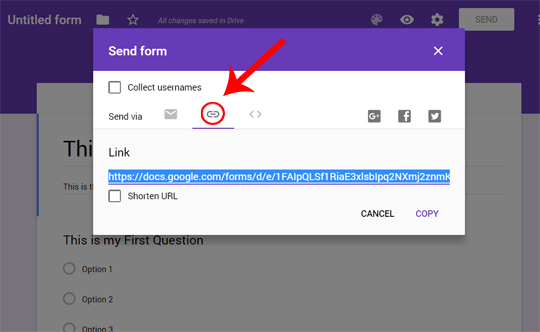
Step 2: In addition, you should be able to alter the form's height and width to make it fit your blog's layout. You have complete control over the dimensions of your form.
Step 3: Open any post on Blogger where you want to insert your Google form. Once you've opened the Blogger post editor, switch to the HTML tab and paste the code you've copied.
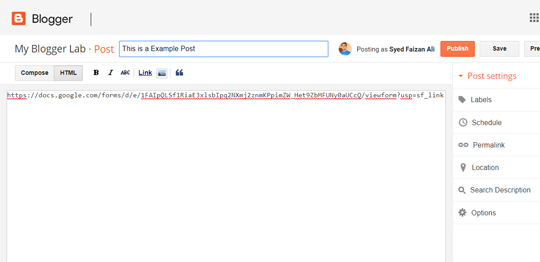
Step 4: You can now use the "Update" option if you want to make changes to an already-published post. To publish your form, simply click the "Publish" button when adding it to a new post.
So, as you can see, embedding a Google Form into a Blogger site is a simple and effective method. You don't have to get bogged down in lengthy code snippets or become bogged down in coding mistakes. Take your time, explore the Google form's additional features, and have some fun with it. The possibilities are endless when it comes to creating an engaging format for a blog.


You must be logged in to post a comment.